9-13 july 2018. spent the week working on ceramic processes with brigitta seck at NCAD this week. started by revising the main clay building processes with an emphasis on technique rather than concept, although we could have worked with a theme in mind it seemed better to let the processes see where they took me. basic processes included pinch, coil and slab building as well as working on decorating surfaces – decorating slips, glazes (to be applied on 2nd firing) and surface textures such as scrafetto, sponging, inlay, pressing, pouring, dipping, masking etc. we also looked at best kiln practice for loading and programming the kiln. what the course highlighted was the possibilities of the basic clay processes in making forms beyond what might be expected. also the endless possibilities of surface decoration with decorating slip. in time these processes may become part of a more focused enquiry of landscape, gender, domesticity, or…. some notes…
day 1: pinch pots. pinch pots can be a a way to make multiple forms, either single or added together or by pressing forms in and out with thumb into organic and bulbous forms. also joining 2 pinch pots to form spheres – a blow hole in closed forms is needed. design and textures can be scored, marked, subtracted or added on, such as extruded thin coils of clay which does not need slip when added to form only presses gently. it is possible to pare back the surface of pinch pots when leather dry. really lends itself to organic forms and as i later found out – simple decorating slip pouring. the clay used was red grog which is very workable – a low firing earthenware clay at 1060 C. when we looked at examples of pinch pots past and present they have remained essentially unchanged throughout the centuries.


day 2: coil building. we did coil building without using joining slip but joined by thumbs spreading clay to join on inner surface. when building concave forms a template to guide the coils uniformly around the form is useful. a turntable is also useful to work on round forms. coils can be interrupted with holes, or set adjacent to the form like rods sticking out. coils can also be built into plaster moulds or roll balls and press into mould to create a button effect. leave small plaster mould clay forms to dry for an hour or so and test its ability to come away from the plaster mould by using a small piece of clay to gently press the clay form away from the mould (ie. wait til leather hard). you can also line moulds with cling film or damp paper to make it easier to take out of mould. using lining like this can also become a source of texture for the clay (as i did with i shiver and i shit work). leave larger mould clay pieces to dry overnight and then use a plate or fill with soft material such as newspaper or towel to remove from mould carefully. weaving coils with thin paper clay stips can also achieve a delicate form.


day 3: slab building. explored lots of textures on slab rolling between laths on cloth – leaves, feathers, clothes, textured rollers from scarva are also available. textured plaster slabs can be made which can be used to roll clay on top of such as cardboard. i usually get a little frustrated with slab building as joining can become messy and clunky but when worked at leather hard stage then form building construction was easier to achieve with cleaner cuts and joints. also a blade is better than plastic shaping tools. making cylinders worked well with a hard roll covered in newspaper which can be removed from the form easily. again, working on the turntable was an advantage for cylindrical forms. we looked at the long history of slab building such as writing slabs and friezes. templates for boxes and geometric forms can be used for form building. slump or hump moulds can also help create 3d forms form slabs when clay is still soft. clay can be used as a material for moulds also when biscuit fired or for texture stamps for soft clay impresses. i have a good book on mould building to refer to these methods which also incorporate thick plaster around clay forms to make plaster moulds.


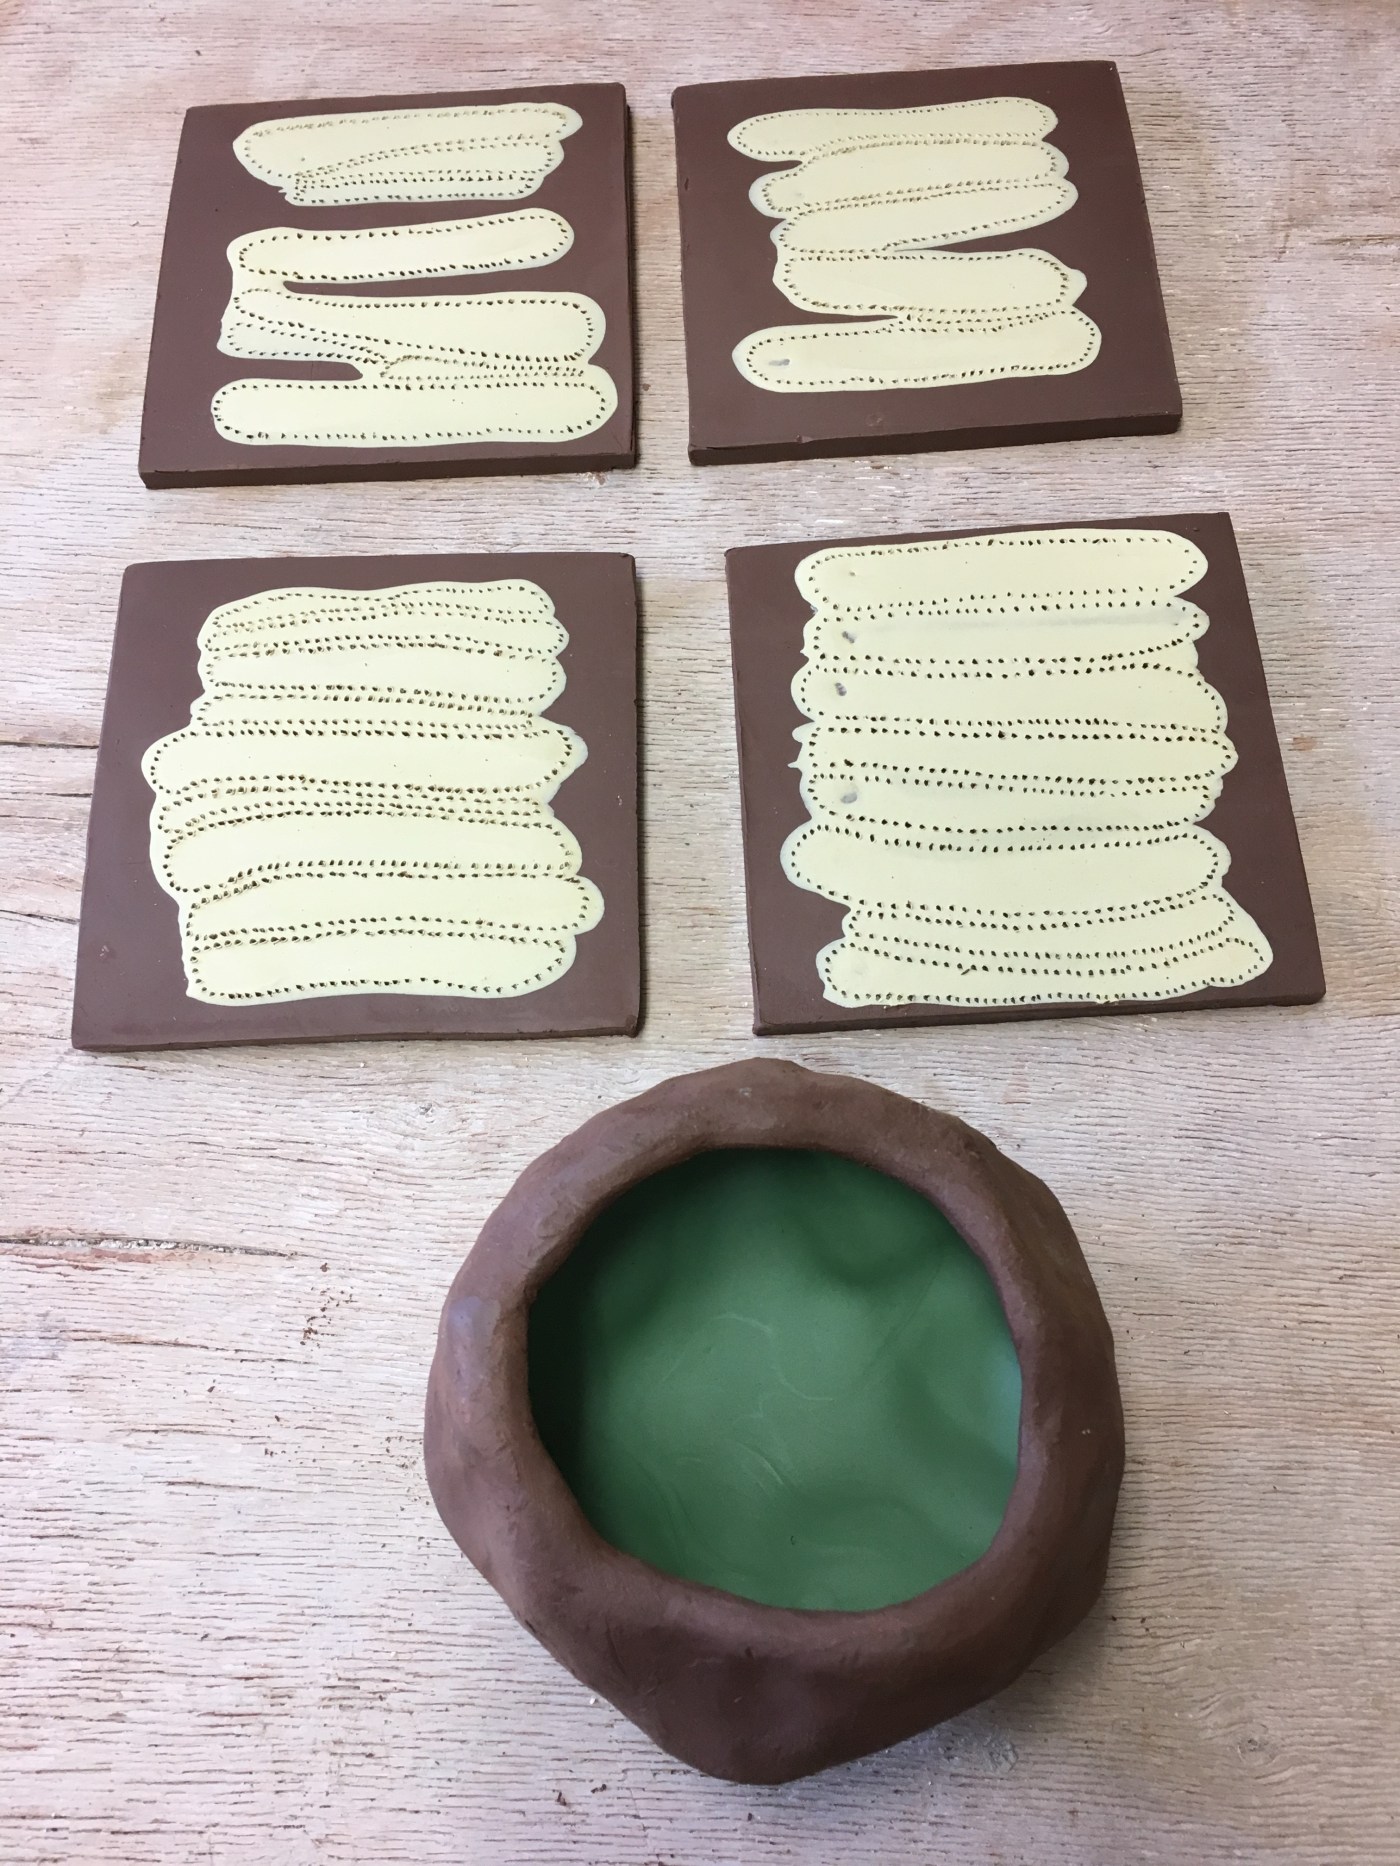
day 4: ceramic surfaces. spent the day working with decorating slips which have clay bodies and stains in them. the main colour decorating materials include decorating slip (clay), oxide stains (colour minerals) and glazes(glass, and/or stains). (amaco) underglazes can be put on bisque fired ware with glazes on the third firing. we used decorating slip which can be put on leather hare ware and then a transparent glaze (appropriate to clay firing temperature) as a second firing. what was good about the decorating slips were there versatility in surface texture decorating – sponging, pouring, dipping etc and scraffeto a marking or scoring technique which removes the slip colour. which i found worked best when applied thinly as may crack even before the kiln if too thick. stencils, masking using damp newspaper also created sharp geometric shapes of colour on the clay surfaces. there are lots of ways to play around with slip surfaces and combine techniques in so many ways. mono printing could also work using paper to print on clay. stains could also be used for any of these techniques wax can also be used as a resist for glazes on clay surfaces (when bisque fired). although we didn’t use oxides (liquid or powder to be made into a liquid), these are usually painted on then rubbed off. there are transparent glazes available for over these in spray form. there are also lots of special effect glazes available – matt, crawl (cracking) glazes. 3rd firing includes over glazes, lustre and decals (which i worked with in mill studios in april). it was useful to have a limited palette of slips – yellow and green, which seemed to complement each other although the green was thick and could have been watered down a bit.


day 5: kilns, decorating surfaces continued. decorating techniques which worked best seemed to be the simple ones of allowing the slip to do its thing ie pour, dip, drip. masking and sponging also worked well. i also felt that the simple forms such as rolled tiles worked very well for small detailed scafetto. we looked at the history of kilns also – the first pit kilns, roman kilns, greek kilns. bottle kilns, raku kilns etc. best practice for using a kiln include – wipe all glaze, colours from bottom, you could make a saucer for them to catch drips during firing. fire slowly – 100C per hour is actually quite fast. soak is the amount of time you keep the temp at the highest temperature. always let the kiln fully cool before opening. cones are a great way to check the firing temperatures or the evenness of the kiln – use 3 cones (under, at, above the desired temp) and place in 3 places (top, middle and bottom) shelves of kiln. apply a butt wash to the kiln shelves to catch stains and add another layer when becomes stained. use three props for best shelf stability. greenware can touch in kiln but never bisque or later ware. fill you kiln evenly as possible and as full as possible for economics and evenness of temperature transfer through out the kiln… an amazing week of learning and experimenting. looking forward to continuing my own ceramic work over the summer. thank you brigetta and fellow artists


Leave a comment